Merge conflicts
Merge conflicts in the dbt Cloud IDE often occur when multiple users are simultaneously making edits to the same section in the same file. This makes it difficult for Git to decide what changes to incorporate in the final merge.
The merge conflict process provides users the ability to choose which lines of code they'd like to preserve and commit. This document will show you how to resolve merge conflicts in the dbt Cloud IDE.
Identify merge conflicts
You can experience a merge conflict in two possible ways:
- Pulling changes from your main branch when someone else has merged a conflicting change.
- Committing your changes to the same branch when someone else has already committed their change first.
The way to resolve either scenario will be exactly the same.
For example, if you and a teammate make changes to the same file and commit, you will encounter a merge conflict as soon as you Commit and sync.
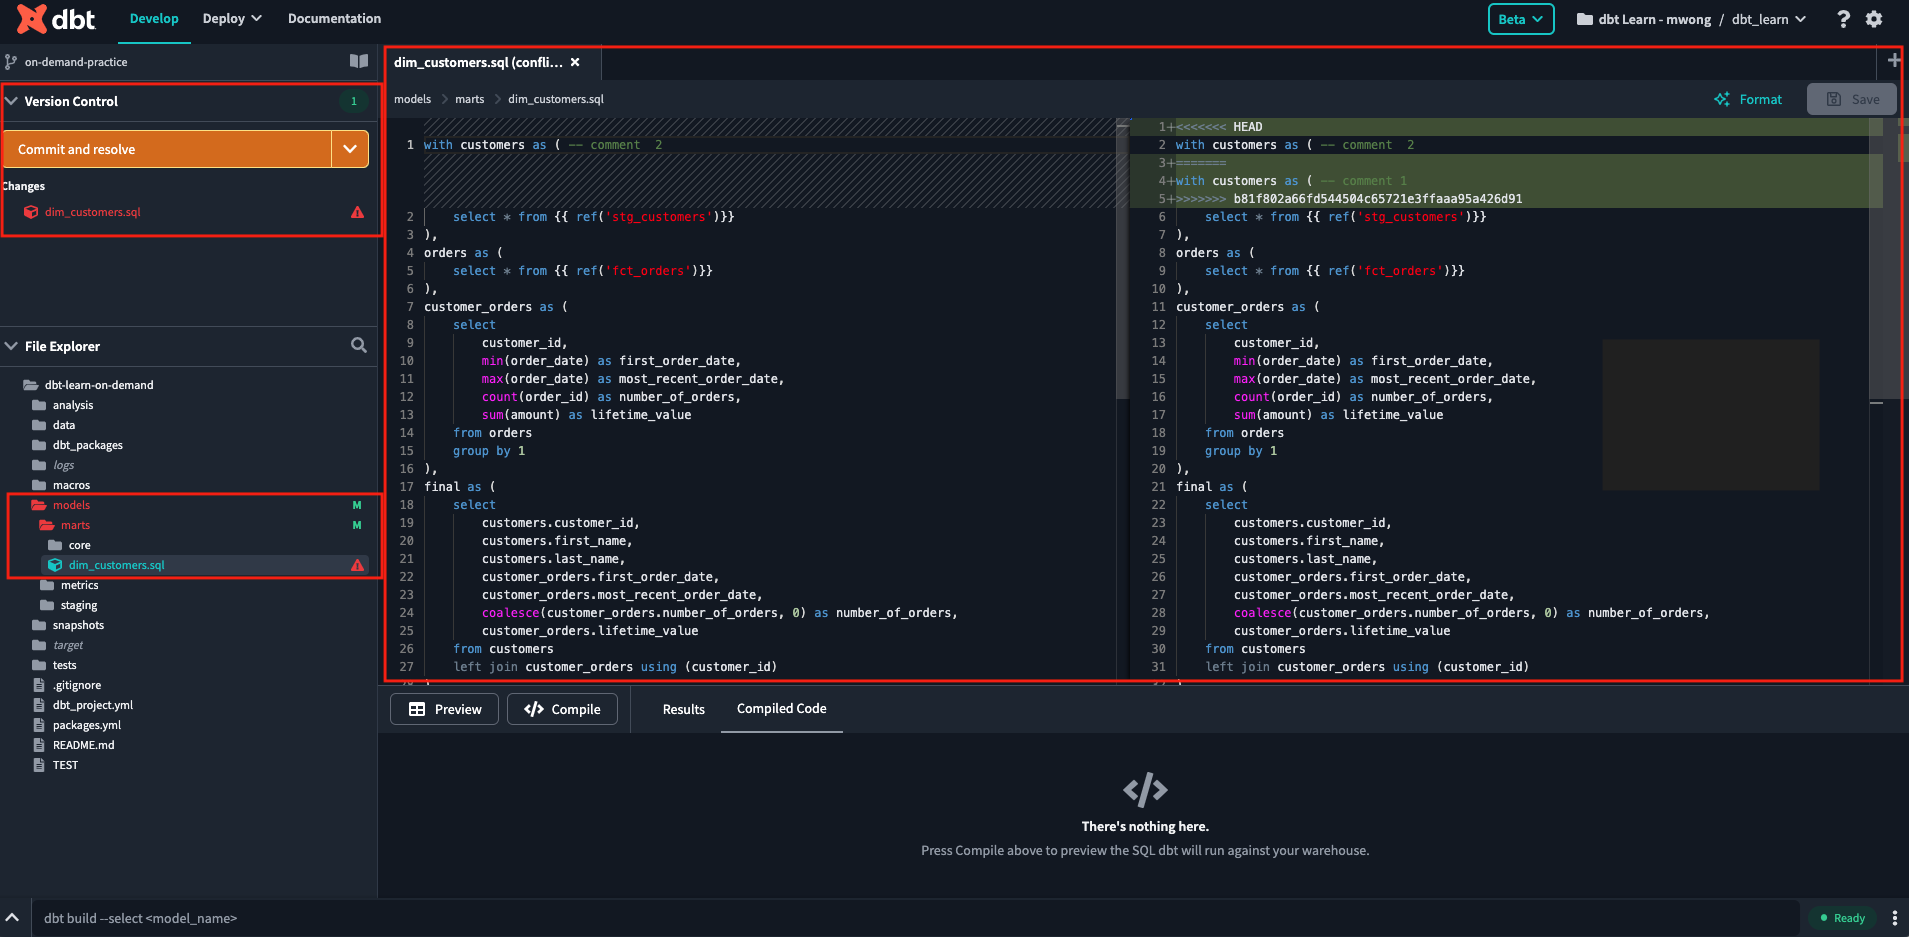
The dbt Cloud IDE will display:
- Commit and resolve git action bar under Version Control instead of Commit — This indicates that the Cloud IDE has detected some conflicts that you need to address.
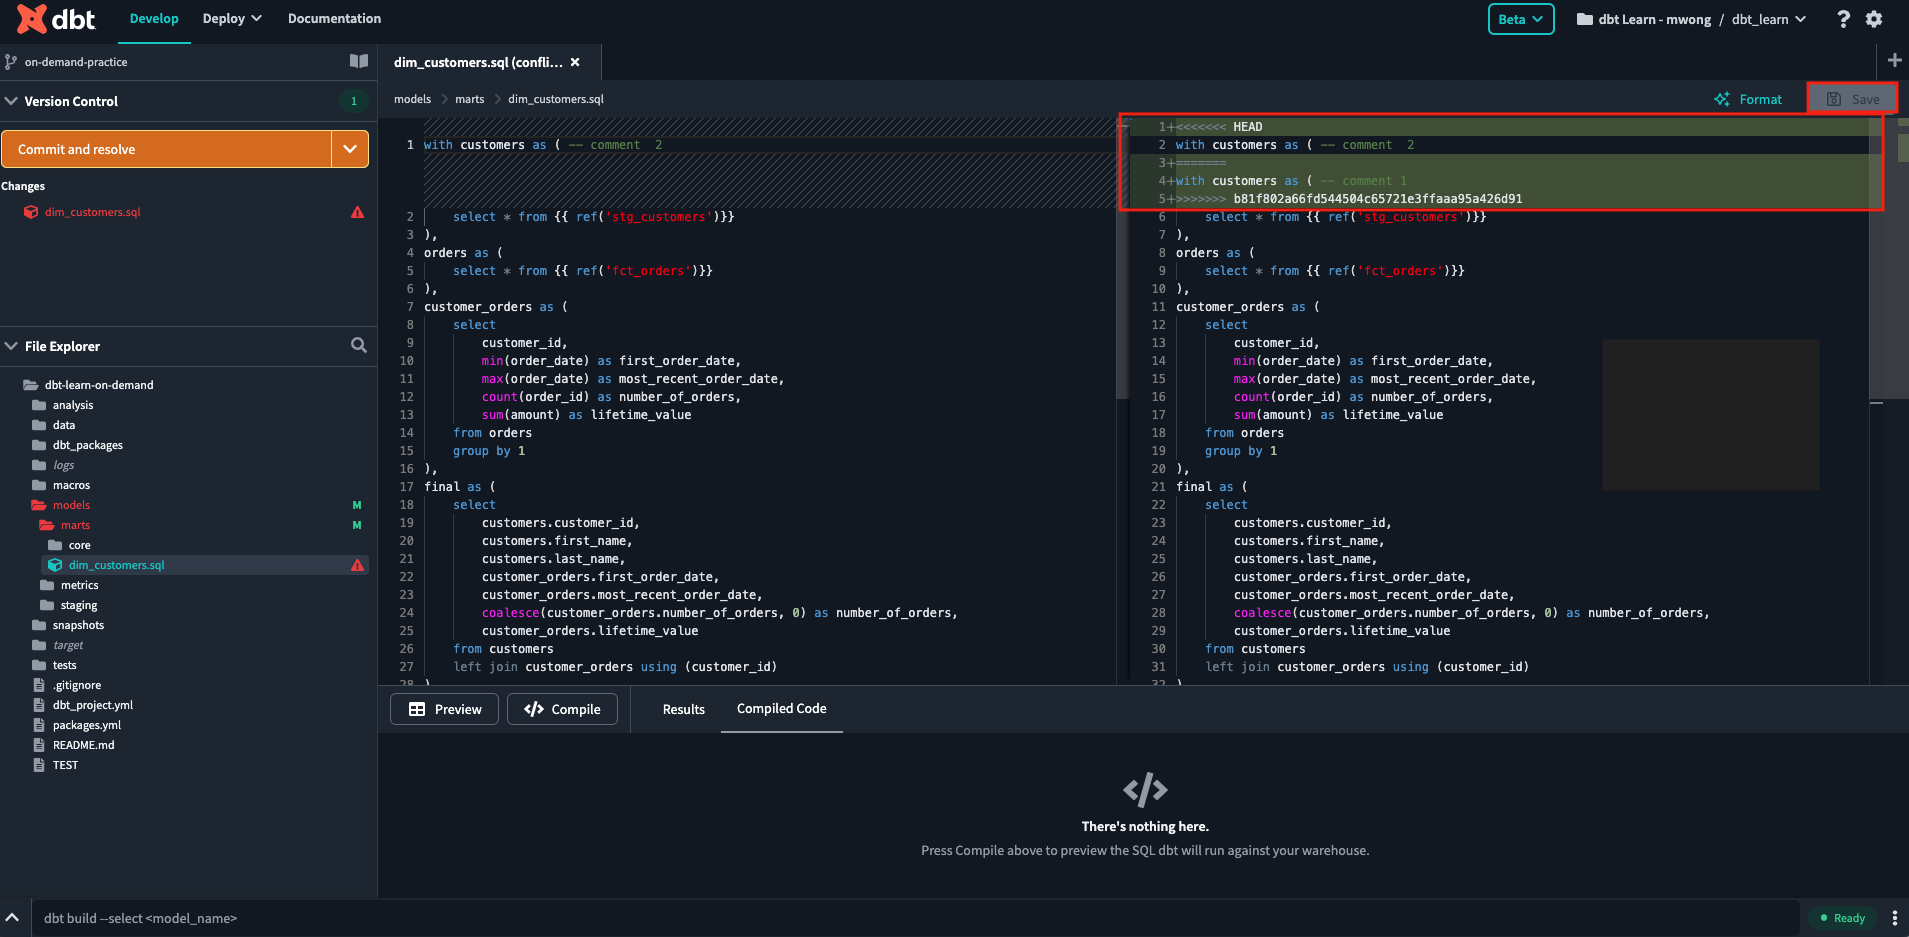
- A 2-split editor view — The left view includes your code changes and is read-only. The right view includes the additional changes, allows you to edit and marks the conflict with some flags:
<<<<<< HEAD
    your current code
======
    conflicting code
>>>>>> (some branch identifier)
- The file and path colored in red in the File Explorer, with a warning icon to highlight files that you need to resolve.
- The file name colored in red in the Changes section, with a warning icon.
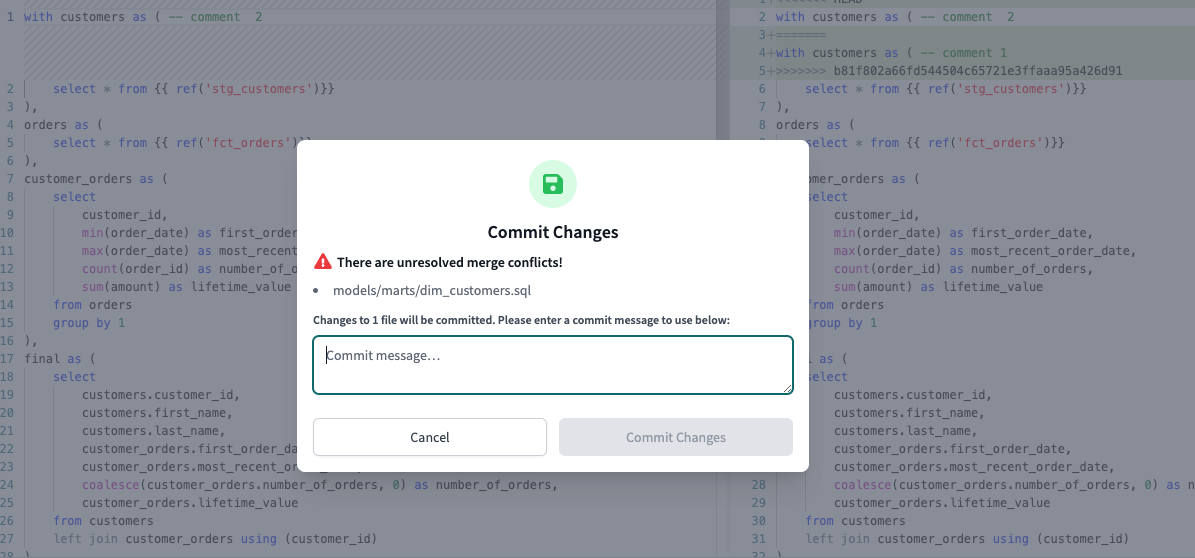
- If you press commit without resolving the conflict, the dbt Cloud IDE will prompt a pop up box with a list which files need to be resolved.
Resolve merge conflicts
You can seamlessly resolve merge conflicts that involve competing line changes in the Cloud IDE.
- In the dbt Cloud IDE, you can edit the right-side of the conflict file, choose which lines of code you'd like to preserve, and delete the rest.
- Note: The left view editor is read-only and you cannot make changes.
- Delete the special flags or conflict markers
<<<<<<<,=======,>>>>>>>that highlight the merge conflict and also choose which lines of code to preserve. - If you have more than one merge conflict in your file, scroll down to the next set of conflict markers and repeat steps one and two to resolve your merge conflict.
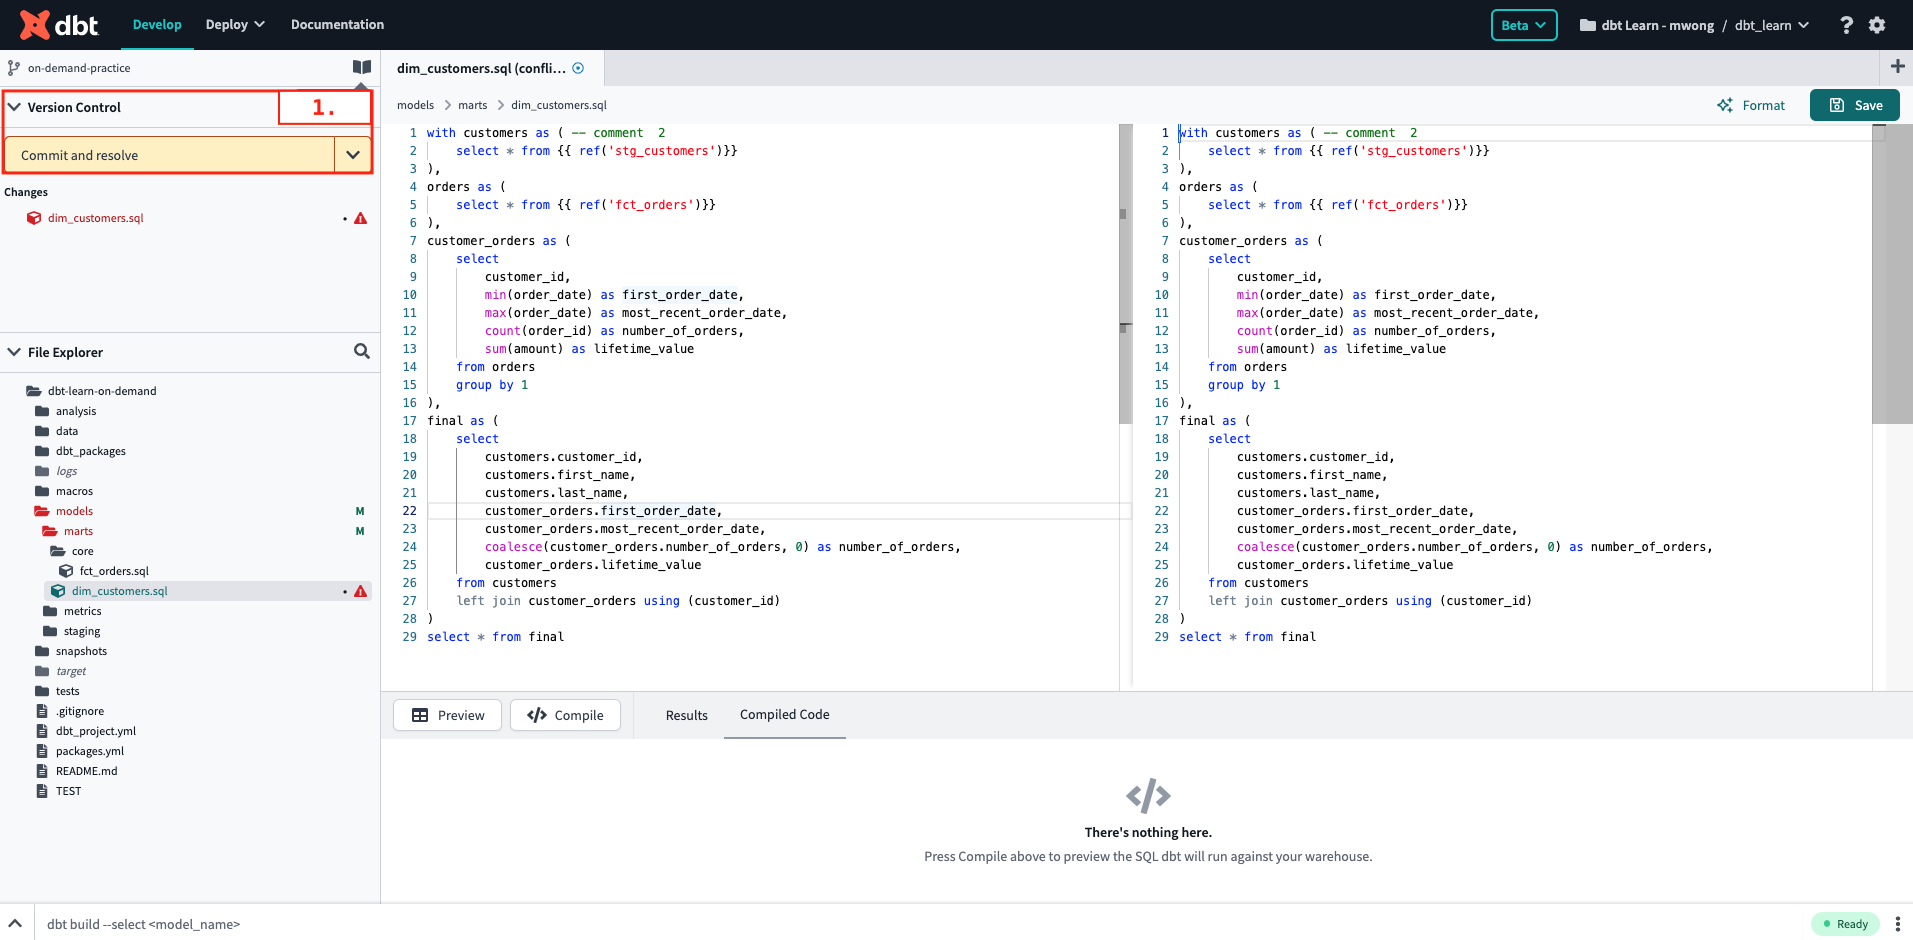
- Press Save. You will notice the line highlights disappear and return to a plain background. This means that you've resolved the conflict successfully.
- Repeat this process for every file that has a merge conflict.
- If you open the conflict file under Changes, the file name will display something like
model.sql (last commit)and is fully read-only and cannot be edited. - If you open the conflict file under File Explorer, you can edit the file in the right view.
Commit changes
When you've resolved all the merge conflicts, the last step would be to commit the changes you've made.
- Click the git action bar Commit and resolve.
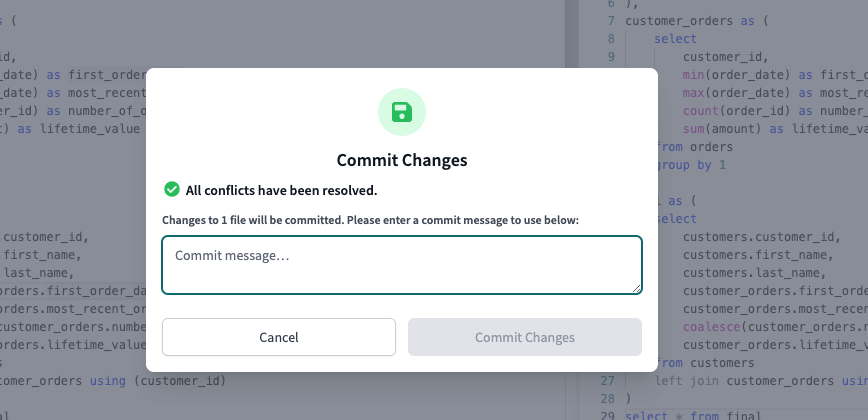
- The Commit Changes pop up box will confirm that all conflicts have been resolved. Write your commit message and press Commit Changes
- The dbt Cloud IDE will return to its normal state and you can continue developing!
